Zach Taylor Work Blog (Wk10)
Total Weekly Hours: 9 hrs
Dialogue System: 6.5 hrs
Quest System: 2.5 hrs
For the start of the 75% I wanted to focus on the Dialogue System for the Witch NPC character. I was able to create a basic text cycle for an NPC that can be activated through the player interacting with them while they are within their collision area. After I set this up I began following a quest system tutorial where I am currently on the third of a seventeen video playlist.
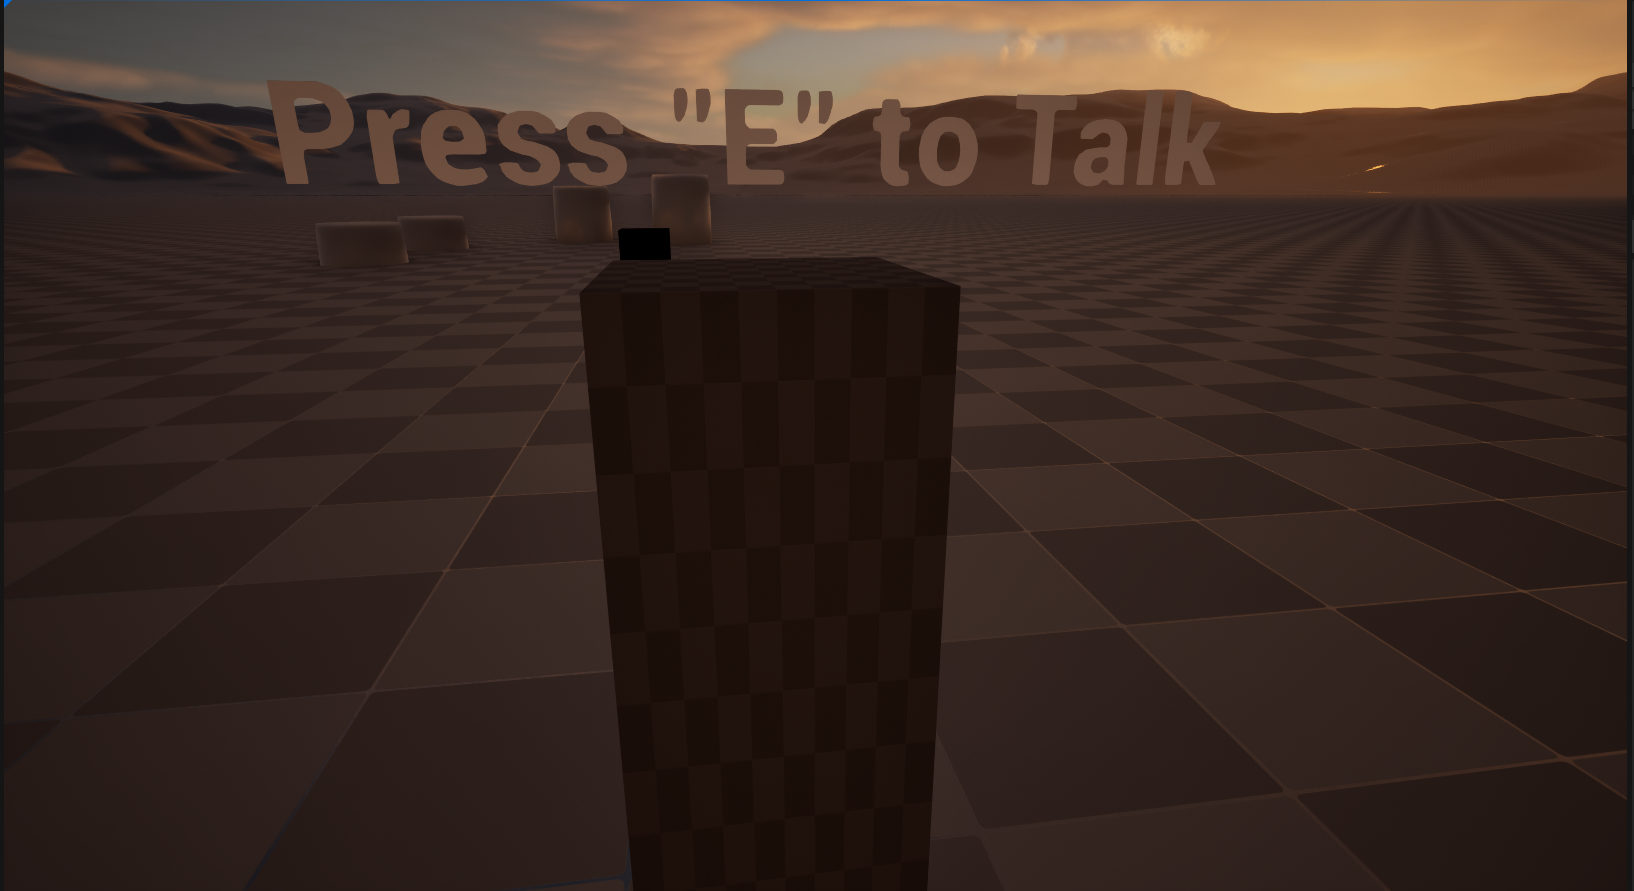
(Fig 1)
(Fig 1) is the initial Dialogue System setup for BP_NPC. The "Press “E” to talk" text appears when the player is within the interactable collision area. E will trigger a FadeInOut animation and cause the camera view to switch, zooming into the NPC talking.
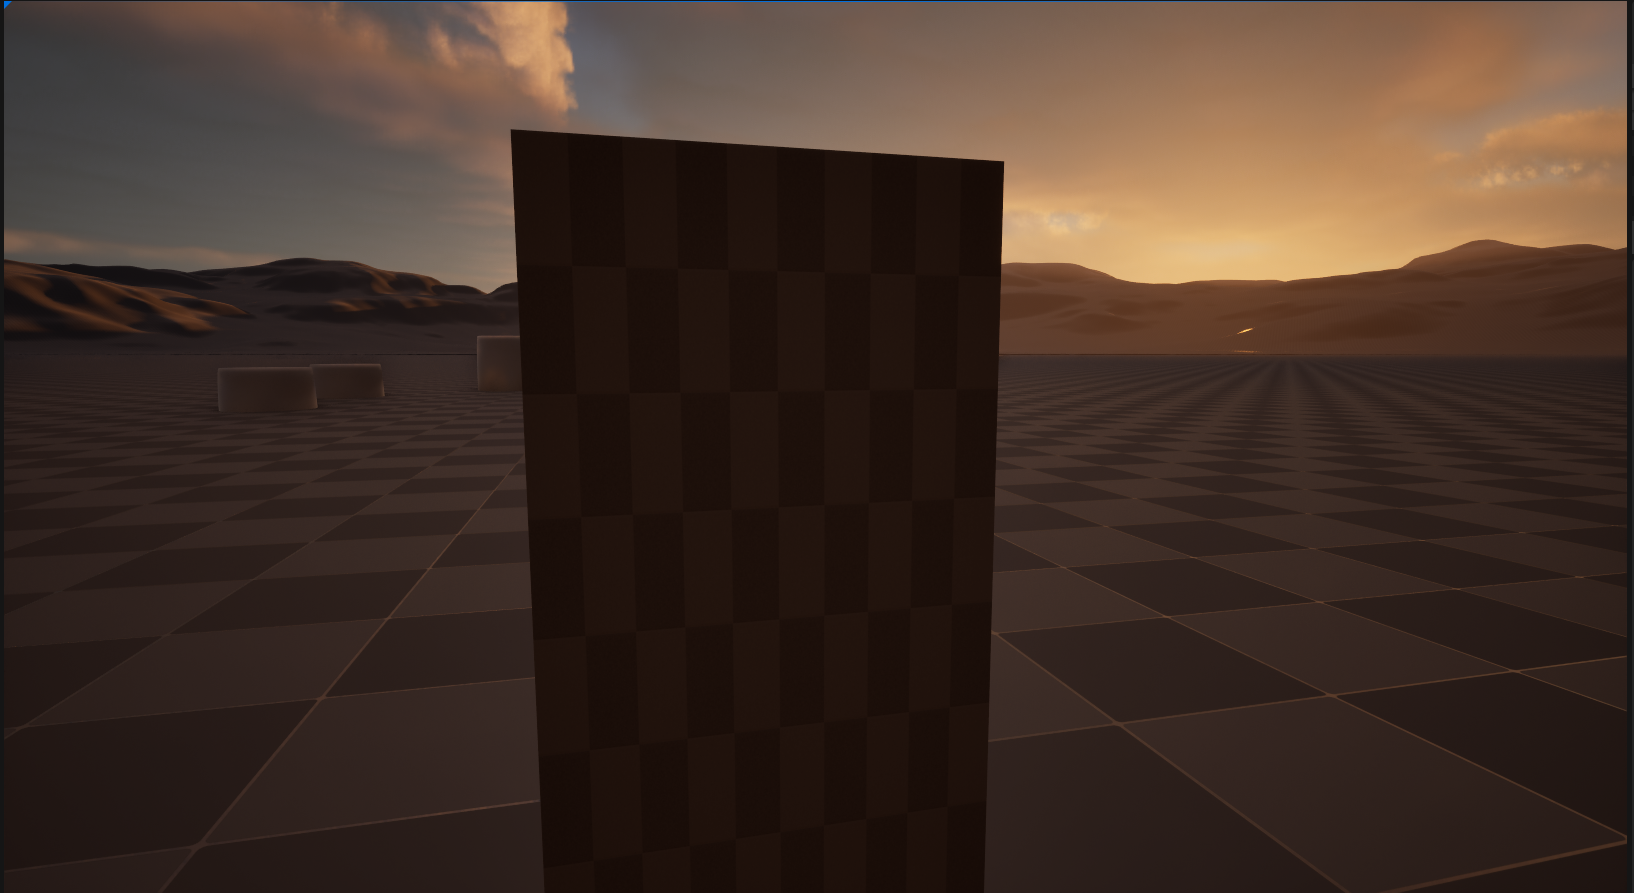
(Fig 2)
(Fig 2) is the changed camera angle from (Fig 1) that was preceded by a camera flash and zooms into the talking NPC. This is meant make the focus of conversations directly on the NPC that is talking.

(Fig 3)
In (Fig 3) the BP_NPC construction script sets the camera and player locations when the dialogue interaction is triggered. The cone is a placeholder for where the player will stand during the interaction. By putting these nodes within the construction script the locations are already set at the launch of the game.
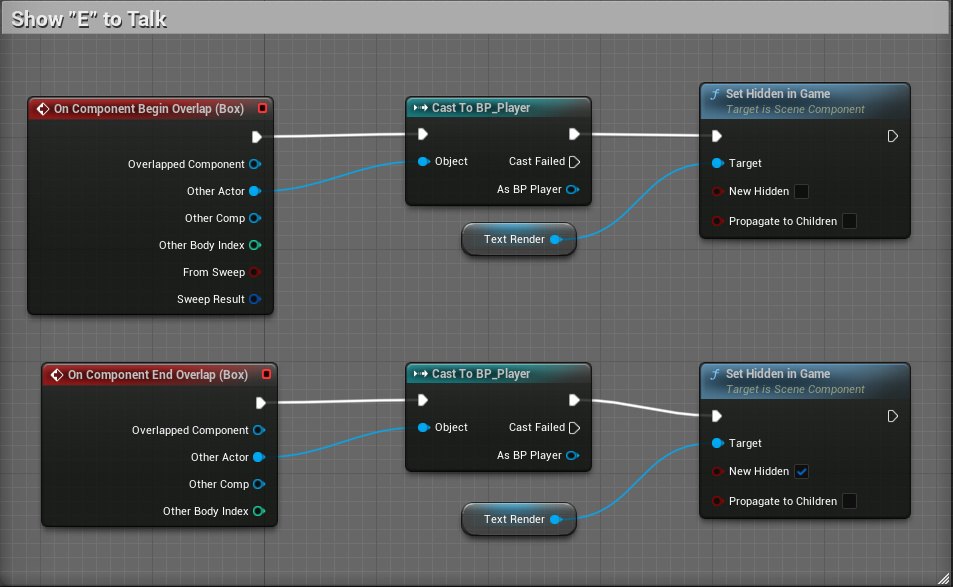
(Fig 4)
In (Fig 4) the nodes setup within BP_NPC that make the text renderer “Press E to Talk” appear once the player enters the NPC’s box collision area as shown in (Fig 1).
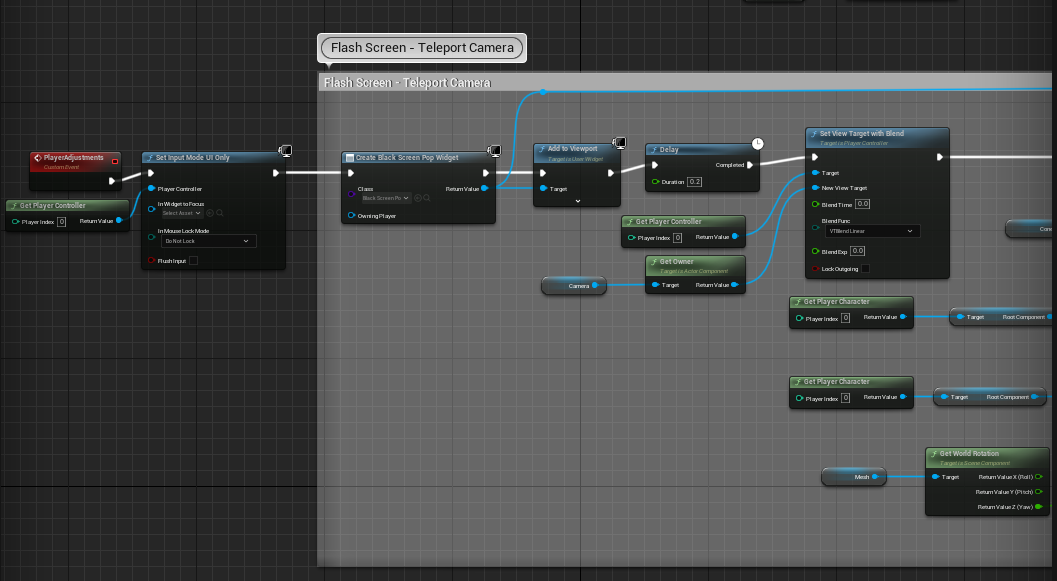
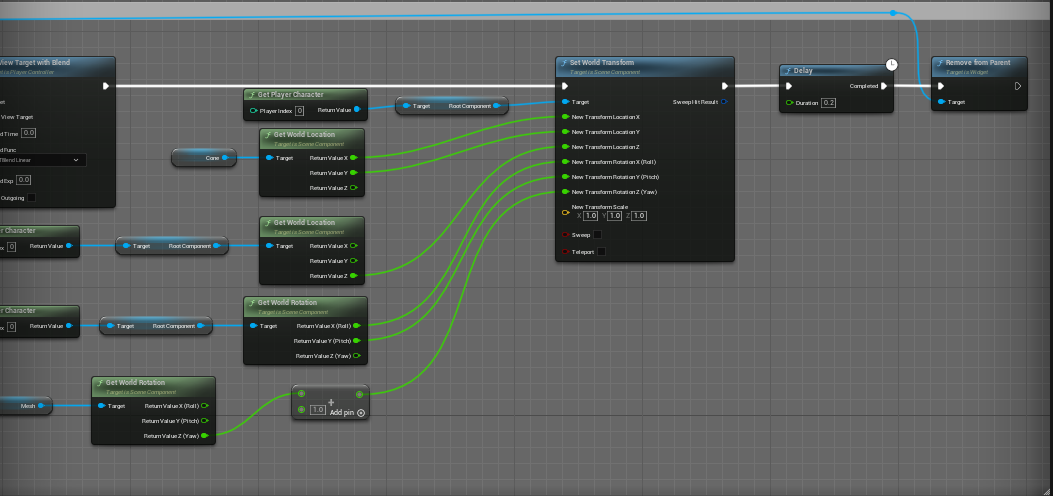
(Fig 5) Top is the left part of the BP, bottom is the right
In (Fig 5) these are the nodes within BP_NPC that activate the BlackScreenPop widget animation and teleport that camera to focus on the location set within (Fig 3) in the construction script.
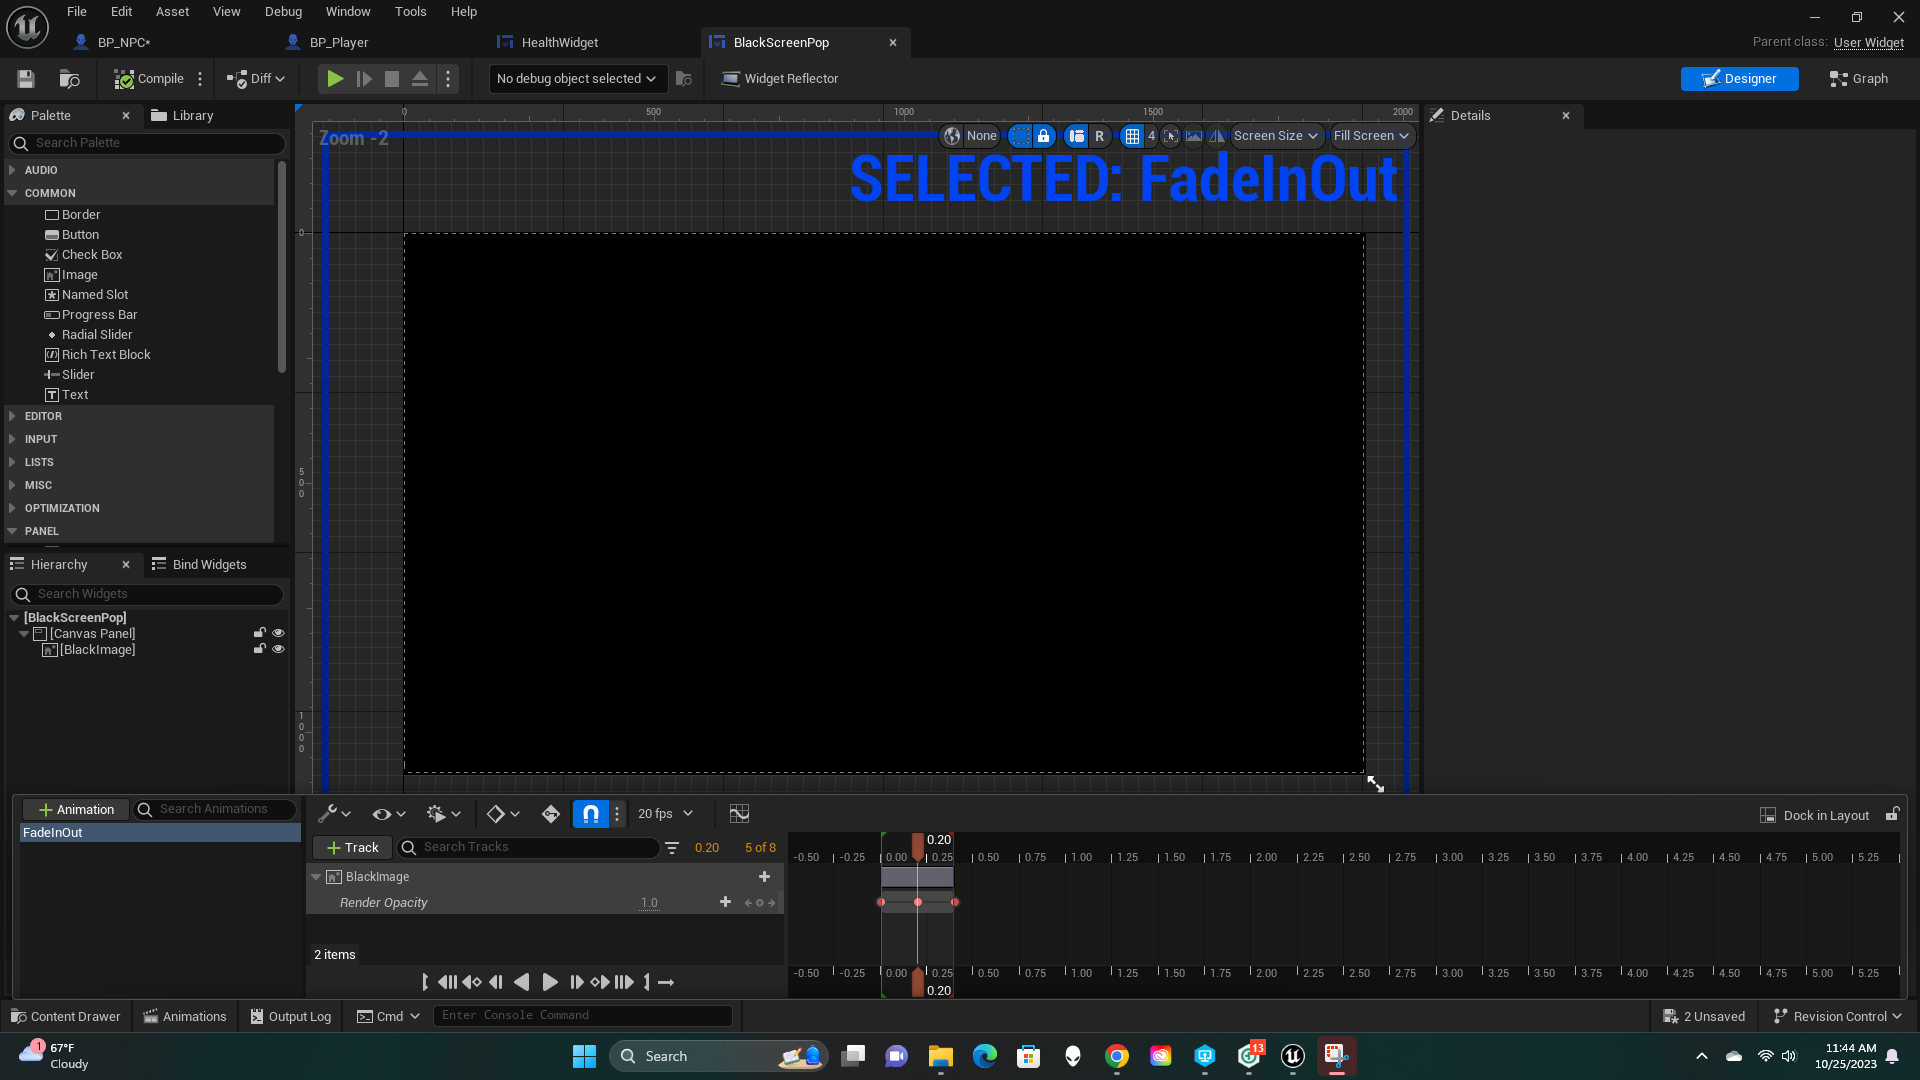
(Fig 6)
(Fig 6) is a screen view of the BlackScreenPop animation that is being activated in (Fig 5) to transition from the default player camera to the one within the NPC interaction. The animation changes the render opacity of the black image from 0 to 1 and then back to 0.
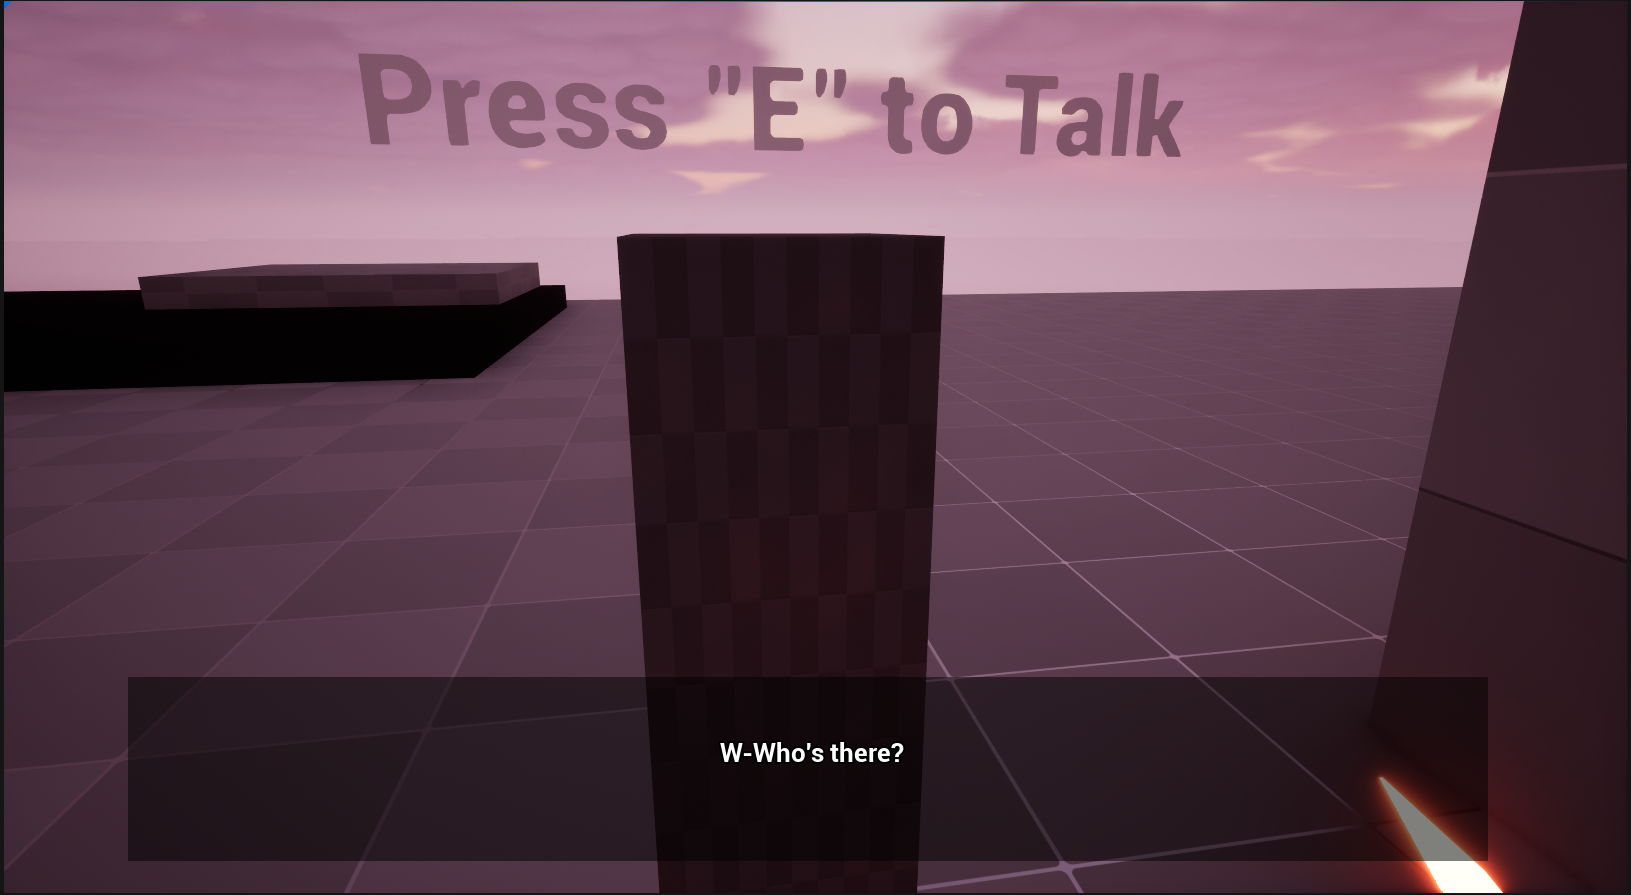
(Fig 7)
The second part of the tutorial I followed for the initial dialogue system had several issues associated with its coding which was also reflected in the comments of the video. I tried to combine a dialogue system from another tutorial with the camera change but the new dialogue boxes were not being displayed in the new camera. The dialogue would appear for a short second during the transition and then immediately disappear. (Fig 7) is how the interaction currently works with the camera change removed. Now the dialogue boxes appears fine and can be cycled through by continuously pressing the interact key until the conversation has ended.

(Fig 8)
(Fig 8) shows the nodes for the dialogue system shown in (Fig 7) which sets up the dialogue through an array that is read in rows until the array has finished; removing the DialogueUI widget from the viewport. The dialogue will then reset if the player interacts with the NPC again.
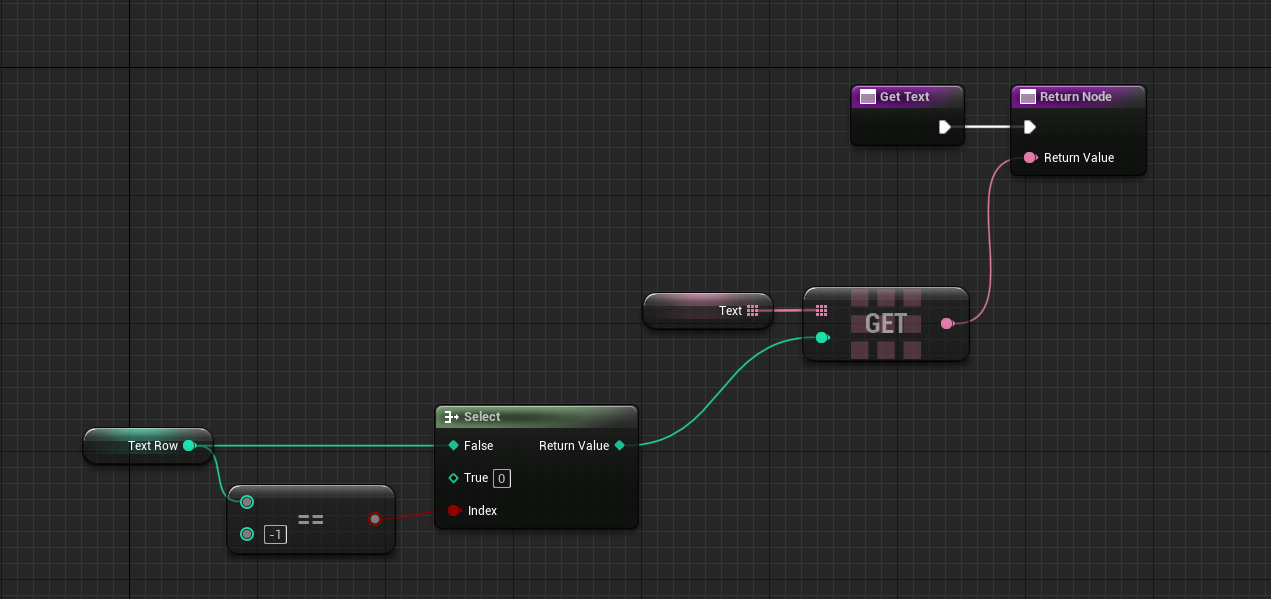
(Fig 9)
(Fig 9) shows the GetText function within the DialogueUI which selects the next text row that is to be displayed.

(Fig 10)
After creating the basic components of the dialogue system I began to make the quest system where several blueprint structures have to be created. (Fig 10) shows the main variables for the quest.

(Fig 11)
I then created the stage details shown in (Fig 11) which are variables for stages within the quest and can have rewards associated with them.

(Fig 12)
The Objective details are shown in (Fig 12) an are specifications within stages to specify the objective type and if stages are optional.
(Fig 13)
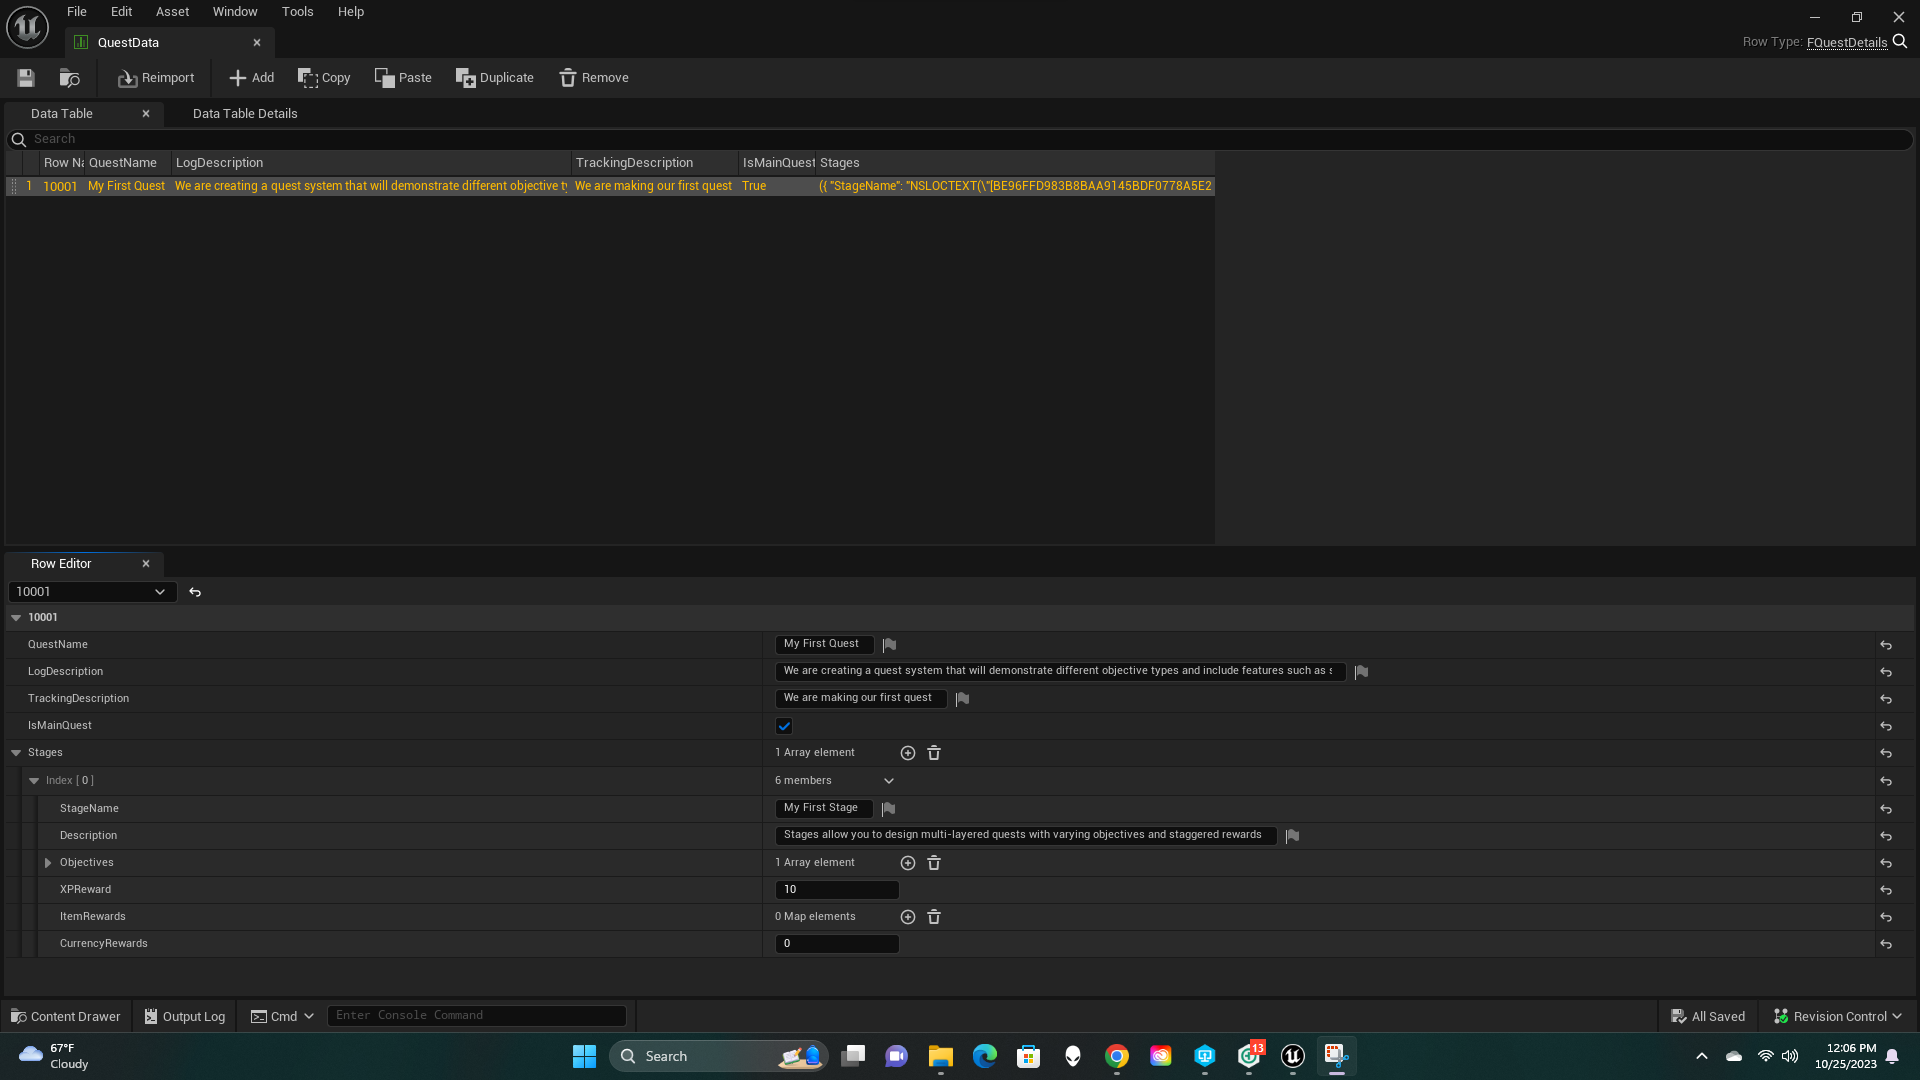
The Quest Data data table shown in (Fig 13) is where all the information for a quest is setup from the variables that were shown in (Fig 10-12)
(Fig 14)
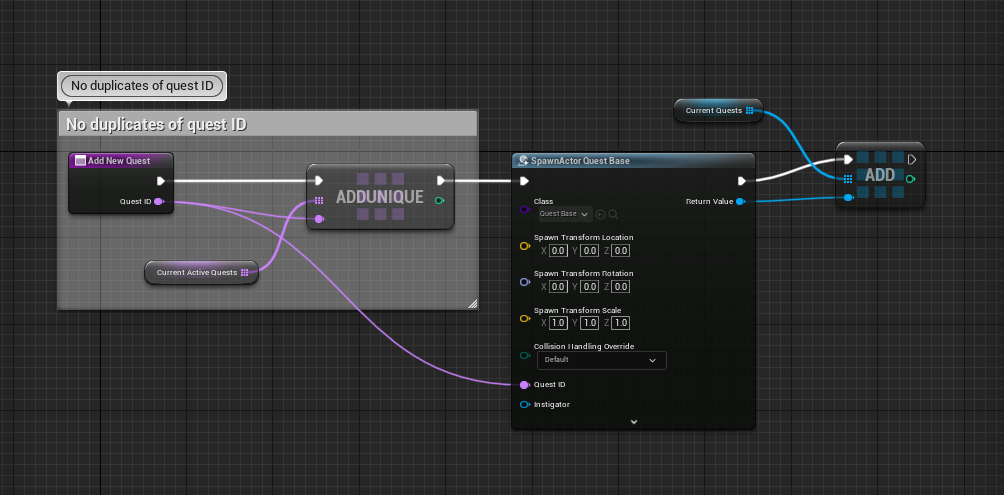
The QuestLogComponent shown in (Fig 14) will be attached to the player and makes it so they cannot get duplicate quest IDs. The actor component also sets a location for current quests.

(Fig 15)
ObjectiveType is an enumerator shown in (Fig 15) that sets the type of objective that the quest will include with the four options being: location, kill, interact, and collect.
(Fig 16)
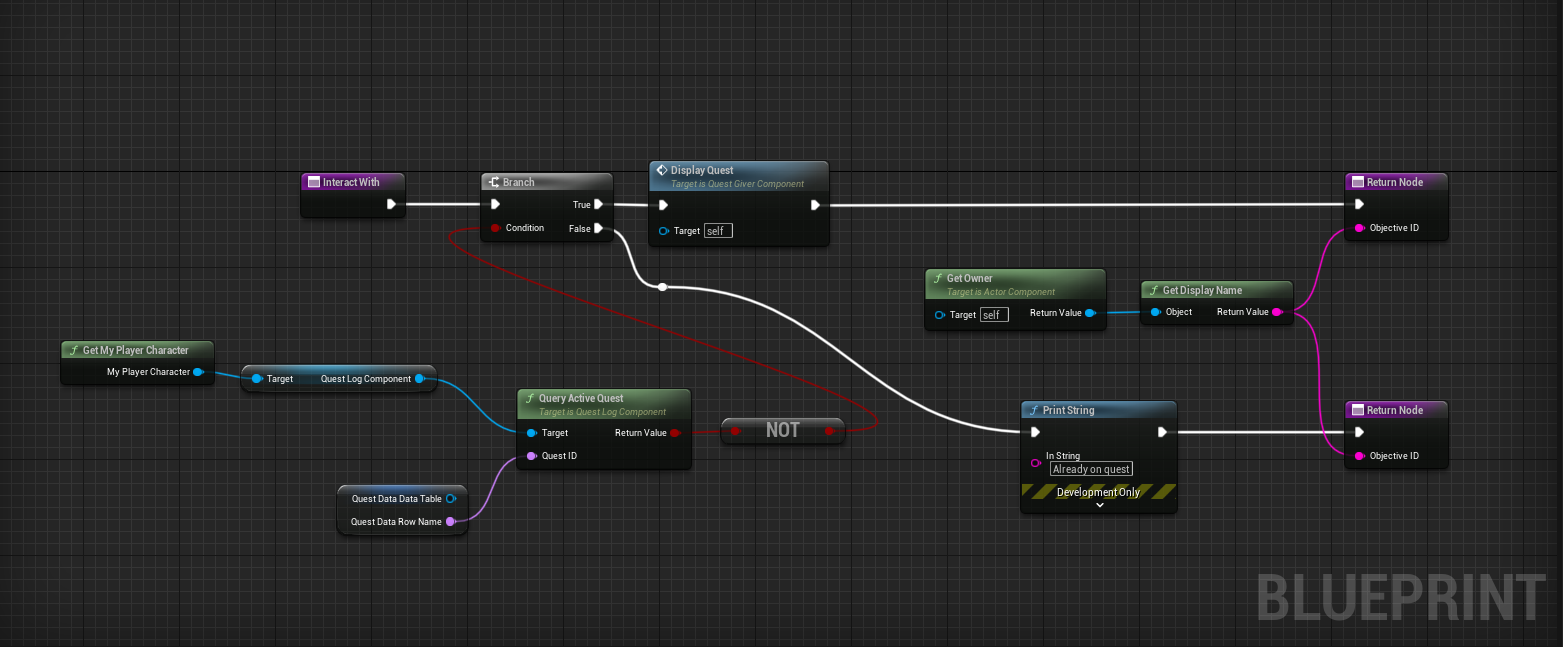
The QuestGiverComponent shown in (Fig 16) will be added to a NPC or actor that will give the player a designated quest. I initially had the InteractWith function be the same as my pre-existing Interaction Interface. This caused the project to crash multiple times when I tried to interact with interactable objects already set up within the level. Depending on how smoothly the quest system implementation goes it might behoove us to add a few side quests, with one being to kill a certain number of shadow creatures. I would also like to revisit the dialogue interface and reincorporate the original camera change I had along with adding typewriter text to NPC dialogue.
Get Soul-Ladra
Soul-Ladra
First-Person Horror-Adventure with Italian Folklore
| Status | In development |
| Author | NitrogenGhoul |
| Genre | Survival, Adventure |
| Tags | 3D, Creepy, First-Person, Folklore, Horror, Low-poly, Narrative, Retro, Singleplayer |
More posts
- David R. Work Blog Week 15Dec 01, 2023
- Week 15 DevLog_KUNov 29, 2023
- Week 15 Work Blog - Irie TurnerNov 29, 2023
- Zach Taylor Work Blog (Wk15)Nov 29, 2023
- Week 15 Dev LogNov 29, 2023
- Dev Log Week 14Nov 29, 2023
- Week 14 Work Blog - Irie TurnerNov 22, 2023
- David R. Work Blog Week 14Nov 22, 2023
- Zach Taylor Work Blog (Wk14)Nov 22, 2023
- Week 14 DevLog_KUNov 21, 2023

Leave a comment
Log in with itch.io to leave a comment.