Zach Taylor Work Blog (Wk13)
Total Weekly Hrs: 9 Hrs
Refine Quest System: 3 Hrs
Main Menu/ Options Menu: 2 Hrs
Combine Dialogue/ Quest Giver Functions: 2 Hrs
Implement Blueprints into Main Level: 2 Hrs
I started the week by moving the majority of the assets and their specifications from the test level into the main “woods” level. I put all of the Players, NPCs and Objects into the player sublevel then put the enemies into the enemies sublevel. I also added location markers for the Bog, Well Clearing and The Pit.
(Fig 1)
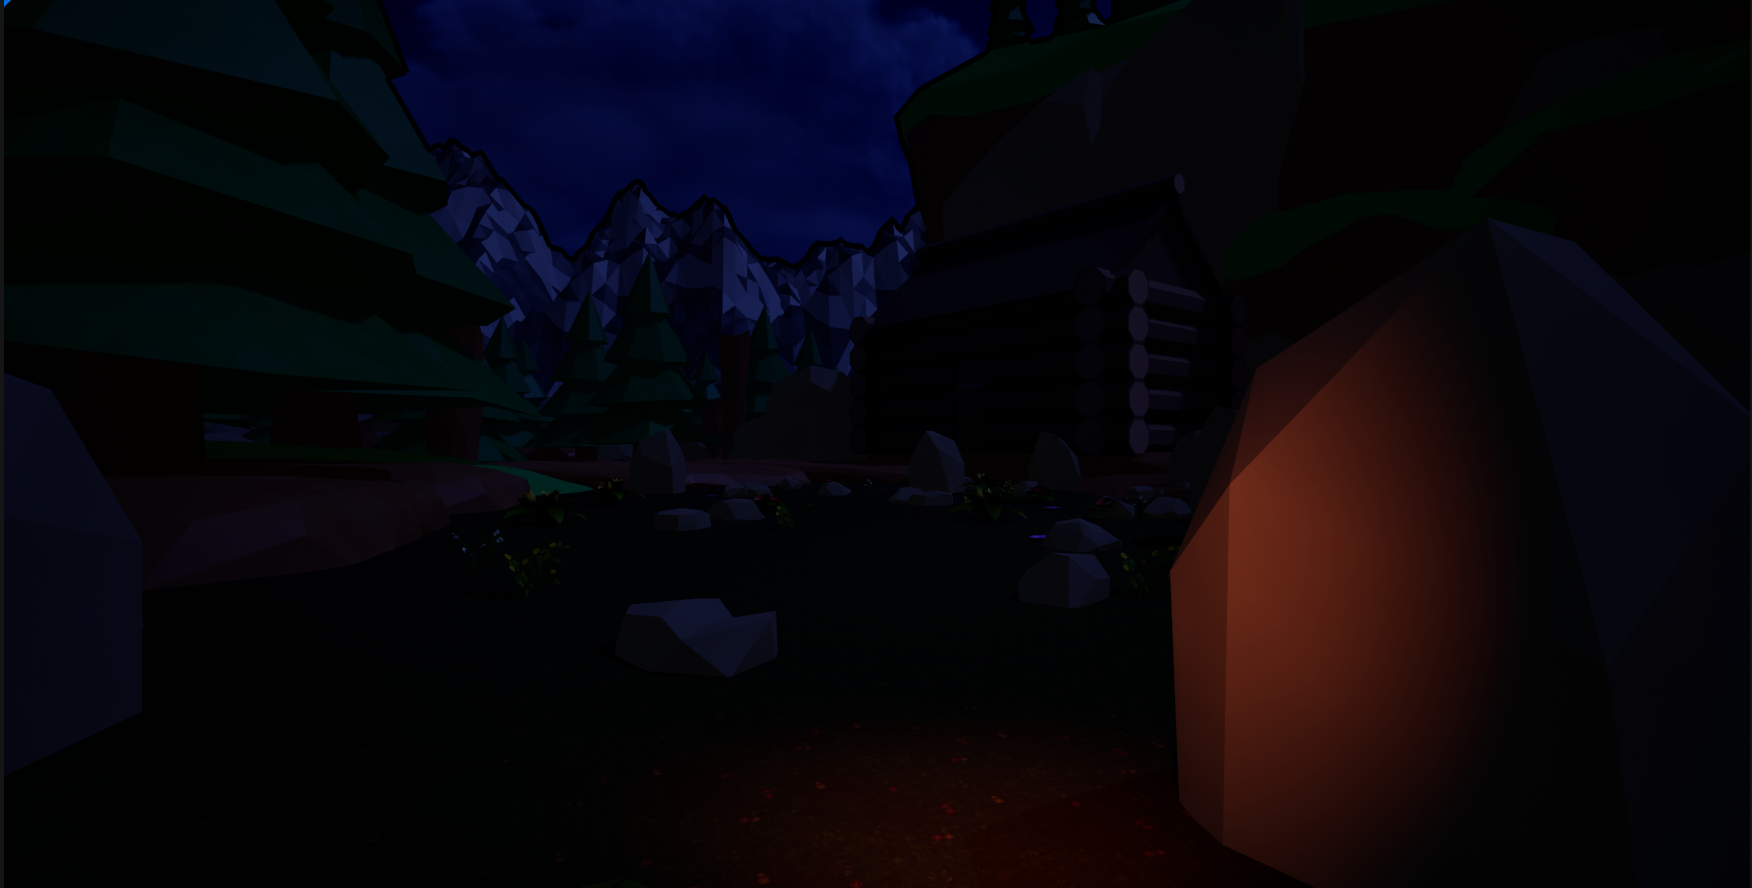
We have had consistent issues with textures on objects being flushed out and not being able to see the corners of objects with the night time directional light that we want for our game. We decided to grab a post process that will help outline the objects and make them easier to distinguish from each other. I also made the directional light brighter but lowered its intensity and color to get what is shown in (Fig 1). This is by no means the final lighting but everything looks much better, the player can actually see where they are going and the level still has the desired nighttime aesthetic.

(Fig 2)
I modified the questline to reflect what we actually want for our game. Stage 1 is to find the bird key. As shown in (Fig 2) This is a collect quest so the player must collect the key to move on to the next stage.

(Fig 3)
Stage 2 shown in (Fig 3) is for the player to collect the comb by interacting with the bird cage after they have picked up the bird key.

(Fig 4)
A blueprint interface was created so that the blueprints of the key and the cage could interact with each other. In (Fig 4), within the key blueprint, the pickup key event from the BPI Cage interface is called after the key has been added to the player’s inventory.

(Fig 5)
In (Fig 5) the blueprint for the cage is shown where when the Pick Up Key event is called a boolean HasKey? Is checked and if it is true they can add the comb to their inventory. I also made a unique location marker on the witch that will only be active after the player has collected the comb.

(Fig 6)
In (Fig 6) the third stage of the quest is shown where the location marker that has been activated is the next destination. With the blueprinting of the Quest System this is necessary to have an objective display for the player that they need to return to the witch. If this stage was not created the objective would be blank and they would have to just know to return to the witch and complete the quest. I feel this adds a little more polish to the quest line. Location markers were also moved to the right hand side of the screen so they do not interfere with quest tracking or quest objective updates.
(Fig 7)
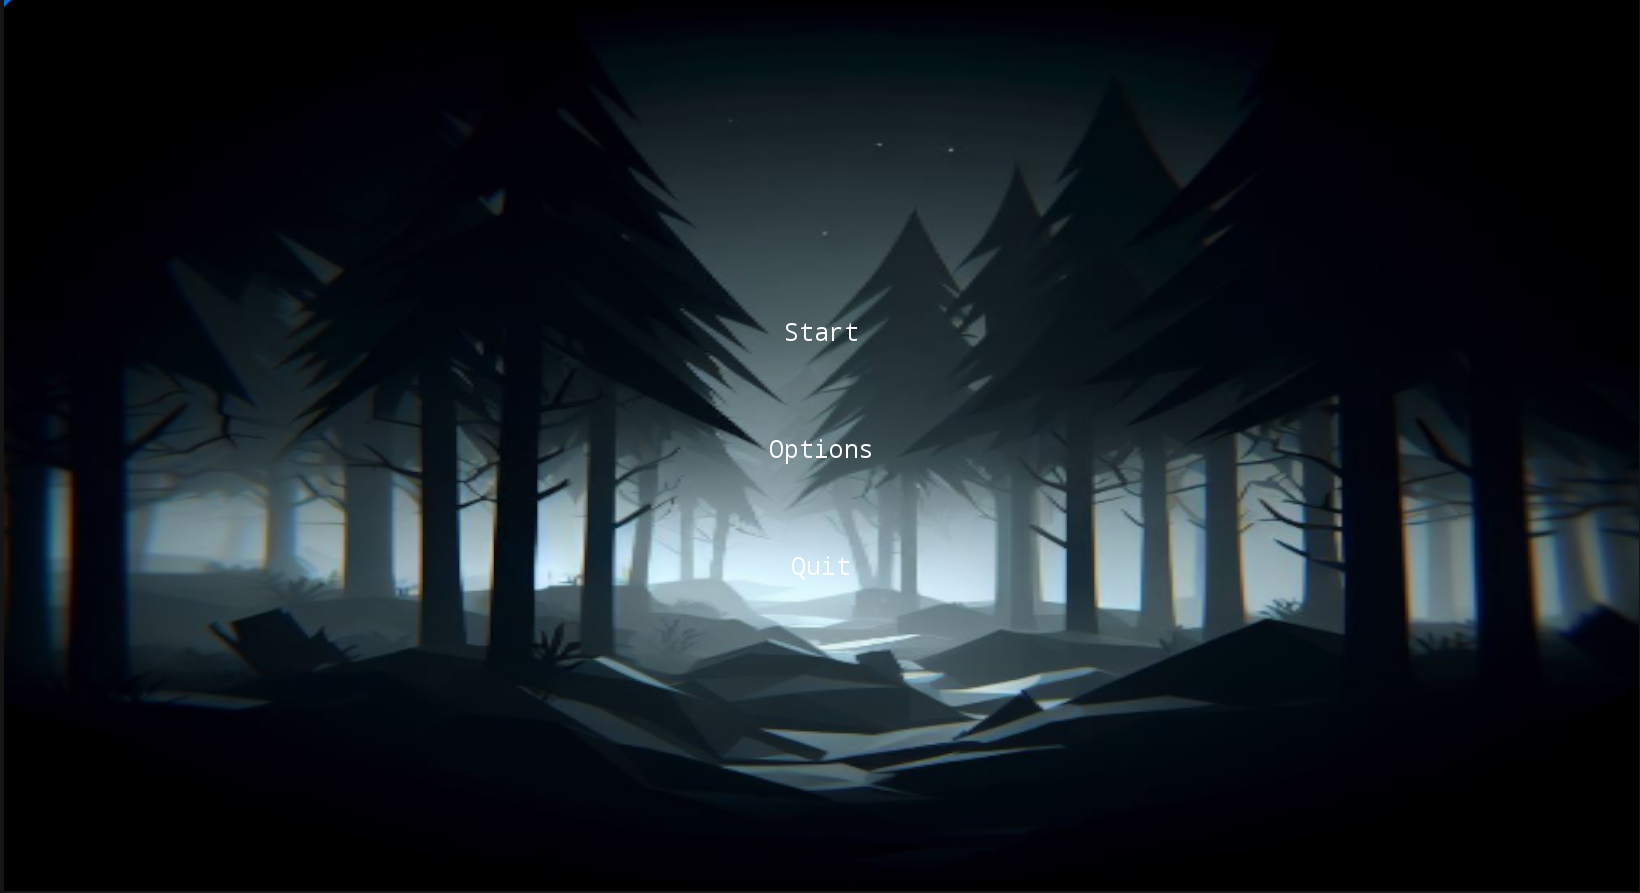
We did not have a main menu level set up in our game so I decided to at least create a basic one for the time being. The background image in (Fig 7) was pulled from our itch page and I feel like it sets the mood well for what is to come. When you hover over the text a faint coral glow is given to the buttons and then when they are clicked it is a bright coral color.
(Fig 8)
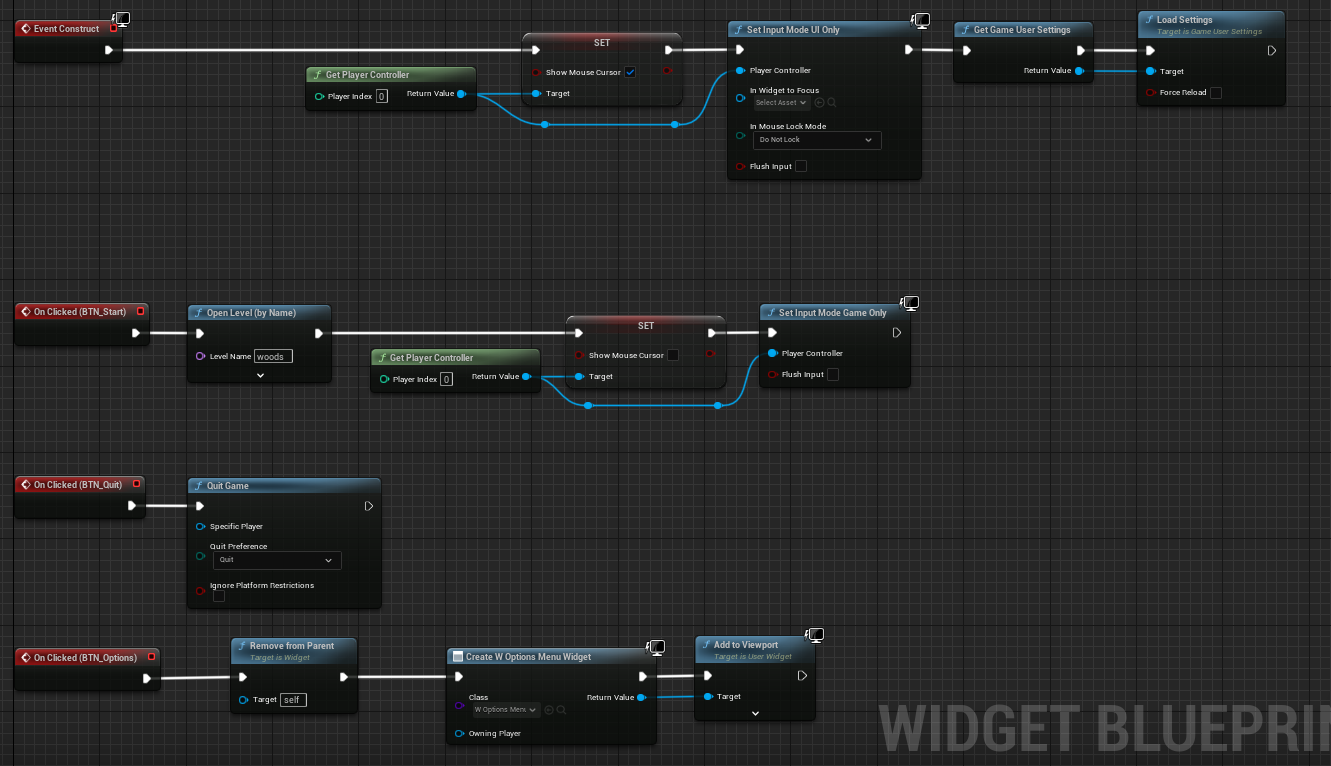
(Fig 8) is the event graph for the main menu widget. It loads the game upon pushing start, quits the game through the quit button and switches to the options widget/ menu when the options button is pressed.
(Fig 9)
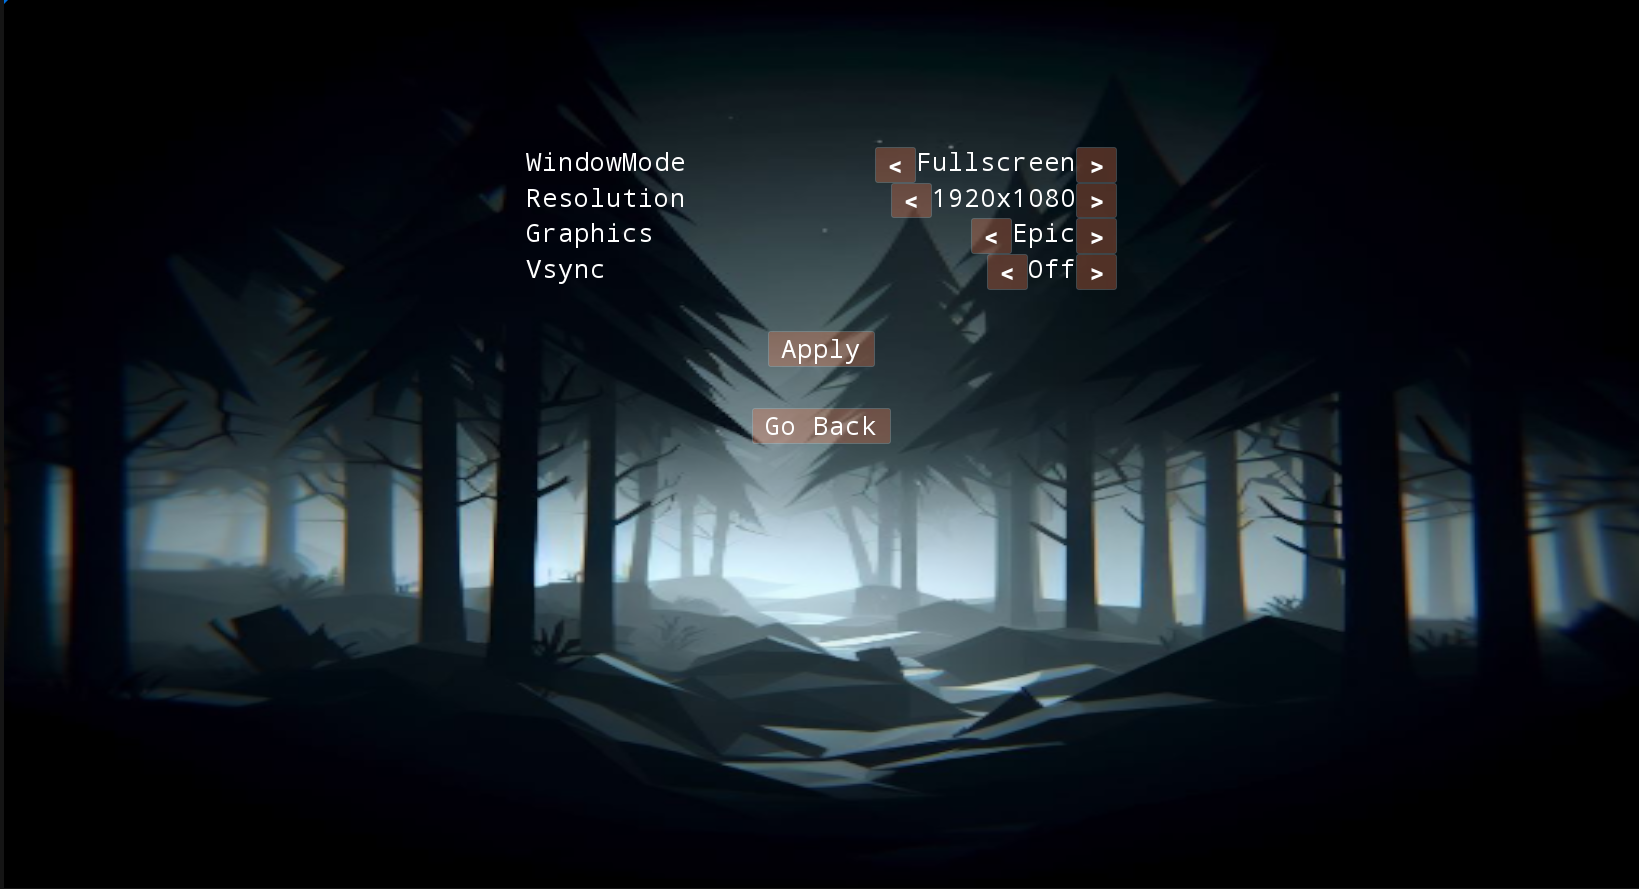
(Fig 9) is the options menu which shows the fain coral glow color that I mentioned when talking about (Fig 7). The way it is set up the player chooses their settings and then hits the apply button to actually have those selections take effect.
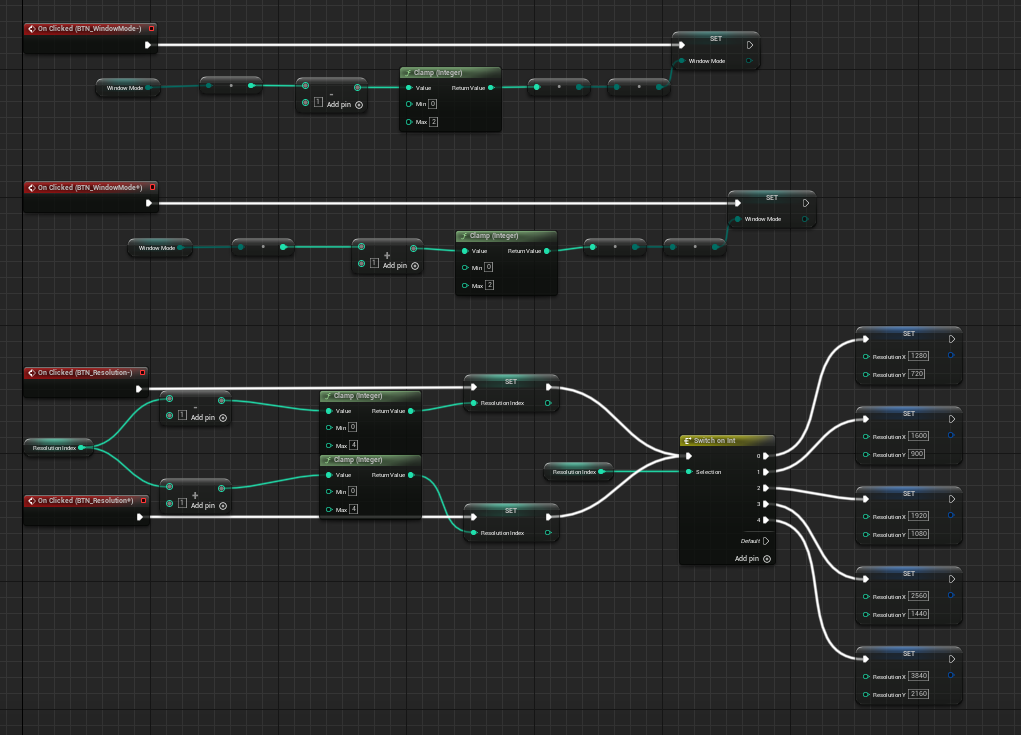
(Fig 10)
(Fig 10) is the first part of the event graph for the options menu widget. The arrow buttons in (Fig 9) were all marked as variables and assigned a + if the were on the right and - if they were on the left of the setting.
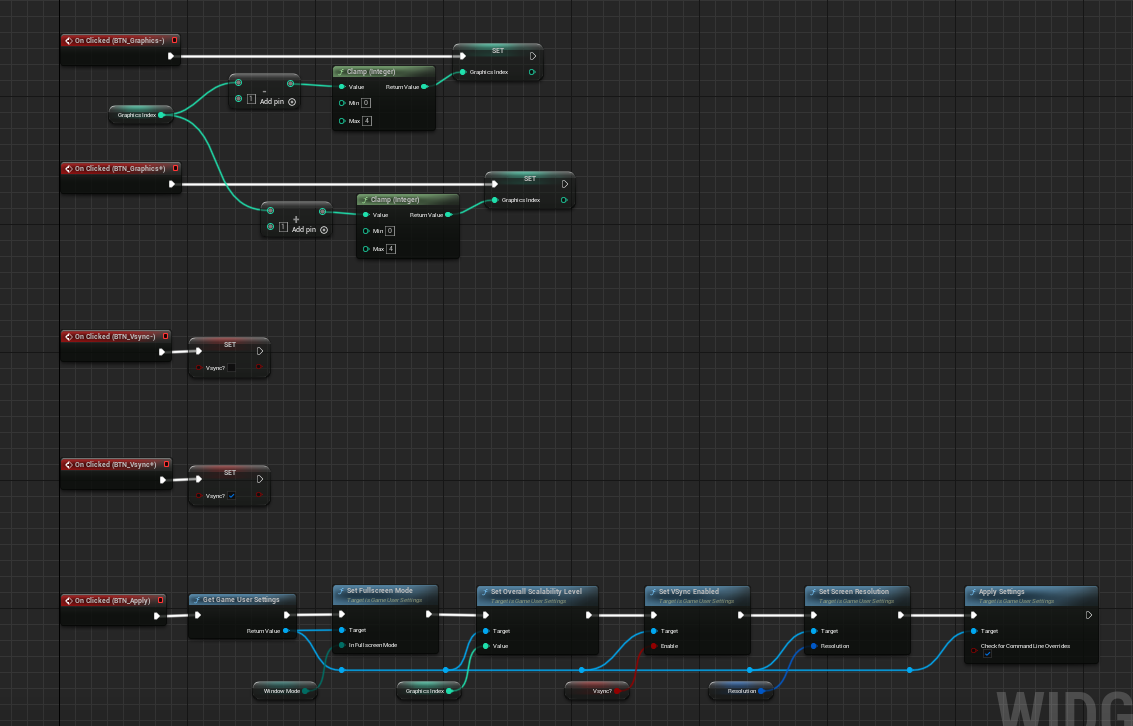
(Fig 11)

(Fig 12)
(Fig 11) and (Fig 12) show the remaining nodes that were used to create the options menu. (Fig 11) shows how the apply button calls the settings that were set by the player and applies them. (Fig 12) uses a system that will remember the settings that the player put and assign them to the default. I decided I wanted to work on my goal of combining the dialogue and quest systems of the different actors (so there could be just a singular witch NOC). Through troubleshooting I found that my attempts started to mess with the Quest System so I decided I wanted to either spawn or teleport the Quest Giver actor into the place of the dialogue actor after the conversation is over.
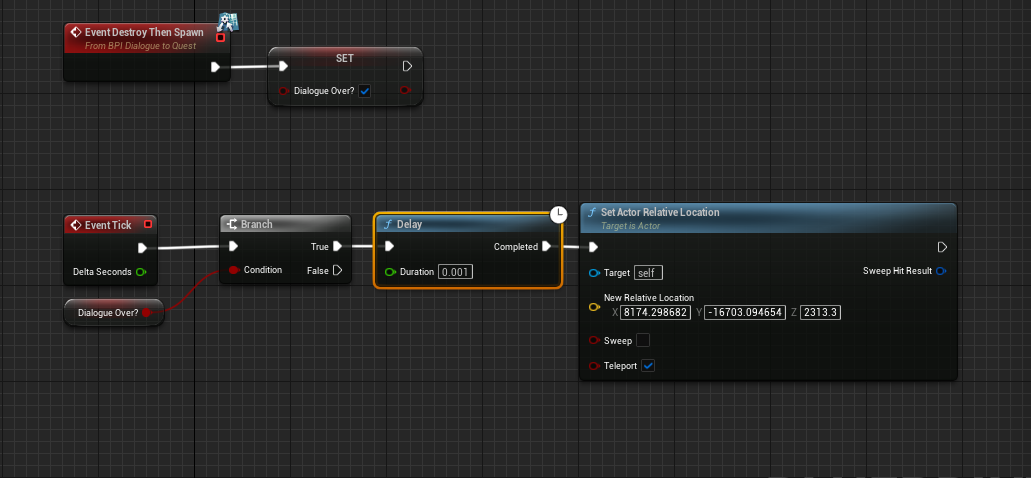
(Fig 13)
I ran into more issues with my attempts but eventually got something I am happy with. I created a system very similar to the blueprinting I did for the key and the cage. (Fig 13) shows part of the BP_QuestGiver actor where the event being triggered sets a boolean that the Dialogue is over. When the dialogue is over the quest giver teleports to the location of the dialogue actor.
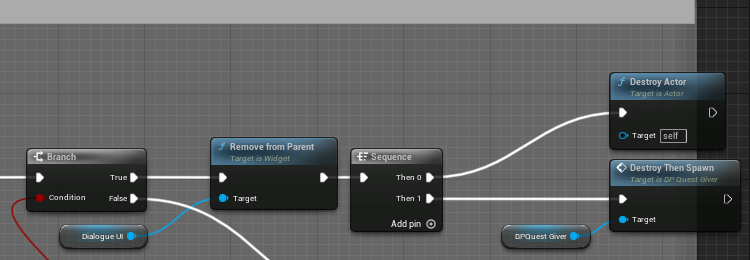
(Fig 14)
(Fig 14) is part of the event graph for the dialogue actor that calls the DestroyThenSpawn function right when the dialogue actor is finished and destroyed. In the following days I really want to focus on polishing all of the enemy interactions and try to implement charm powerups for objects that Andrew recently created. It is also crucial for us to try packaging our game ASAP
Get Soul-Ladra
Soul-Ladra
First-Person Horror-Adventure with Italian Folklore
| Status | In development |
| Author | NitrogenGhoul |
| Genre | Survival, Adventure |
| Tags | 3D, Creepy, First-Person, Folklore, Horror, Low-poly, Narrative, Retro, Singleplayer |
More posts
- David R. Work Blog Week 15Dec 01, 2023
- Week 15 DevLog_KUNov 29, 2023
- Week 15 Work Blog - Irie TurnerNov 29, 2023
- Zach Taylor Work Blog (Wk15)Nov 29, 2023
- Week 15 Dev LogNov 29, 2023
- Dev Log Week 14Nov 29, 2023
- Week 14 Work Blog - Irie TurnerNov 22, 2023
- David R. Work Blog Week 14Nov 22, 2023
- Zach Taylor Work Blog (Wk14)Nov 22, 2023
- Week 14 DevLog_KUNov 21, 2023

Leave a comment
Log in with itch.io to leave a comment.